For the past two summers, I have wanted a new skirt, but have not found anything I liked in a price range I was willing to pay.
It's summer, I want something cute, and comfortable. Especially the comfortable part!
So I decided to do some digging at Goodwill and see what I could find to refashion. For last summer I purchased a white and red sundress with a zipper and turned it into a skirt. When I finished it Kurt said "You should have taken pictures and written about it for the blog." Bummer. I had not thought of that. So this year, I remembered to take pictures for you to see the steps.
This year's purchase was a blue Maxi dress with a printed design. It had an under layer that I wanted to keep for the skirt, so I could be modest without needing a slip. After all, the whole reason for not wearing it as a maxi dress was because I wanted to be modest-LOL! I found the dress at Goodwill. It was the 1/2 off color of the week, so it cost me $3. I've been sewing for a long time, it took me about 30 minutes to do the project and take the pictures. This is an easy project, which you should be able to do with your own sewing machine without too much trouble. Even if you are slow at sewing, it should take you less than 2 hours.
First, you need to find the dress.
I always look in the dresses one to two sizes larger than what I wear because I am intending to move the empire waistline of the dress down to a regular waistline. So if you wear a 6, look at 8's or 10's. If you wear a large, look in the XL section.
Go try the dress on in the changing room, and pull the dress down to see if the length and size will fit where you want the new waistline to be. If yes, purchase your find and take it home to wash it. Dry it on high heat so if it is going to shrink any, it will happen before you begin sewing.
Below are the 8 steps I took from Maxi Dress to my new favorite summer skirt.
Step 1: sew around the dress about 1" below the waistline, this keeps the dress and underdress together when you cut off the top.
Step 2: cut just below the waistline and above your sewing line
Step 3: go look in the mirror again and decide how much more you need to shorten the length (if any.) Sew another ring around the skirt part just below where you want to shorten it to. Then cut off the extra. Because of the printed design of the maxi dress, I wanted to take the extra off of the top, not off of the bottom where it might destroy the flow of the design.
Step 4: zigzag around your new top edge. This helps reinforce the skirt together to the underskirt, as well as prevent unraveling.
Step 5: Turn under the top edge at your sewing line, and then turn it down another 1.25" to make a pocket for the elastic. Sew around the skirt at the bottom of this pocket, leaving a gap of about 3" in the back to insert the elastic.
Step 6: pin down one end of your elastic to the back of the skirt, and then use a large safety pin to feed your elastic through the pocket you sewed. Remember when measuring your elastic that you need it to be comfortable when stretched, but still tight enough your skirt won't slide down. I used 3/4" elastic as the pocket was just over 1".
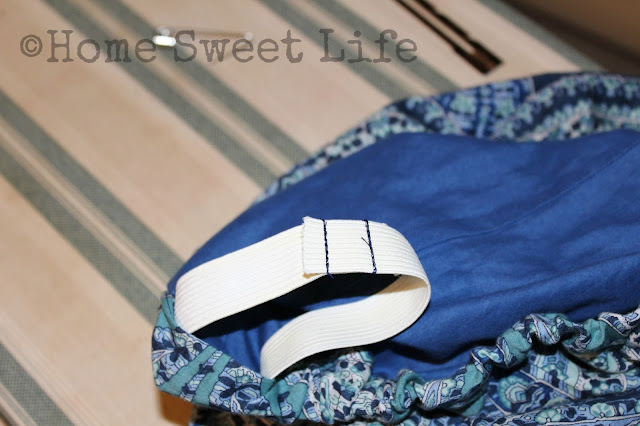
Step 7: after checking to make sure your elastic is the correct size, sew the ends together. Pull the elastic all the way into the waist pocket, then sew in the ditch of each side seam to prevent it from turning over during washing and wearing.
Step 8: sew the opening in the back of your new waistband closed, leaving a tiny opening in case you later decide you want to access the elastic to adjust the back and make it tighter.
Ta-da! You're finished! Go enjoy your new summer skirt.
I've been enjoying mine!


Easy peasy! I love it. And it is so lovely! I'll bet it is really comfy!
ReplyDeleteThank you for sharing. It looks so much better as a skirt too. I'll need to take a look at my local shops to see what I can refashion.
ReplyDelete