
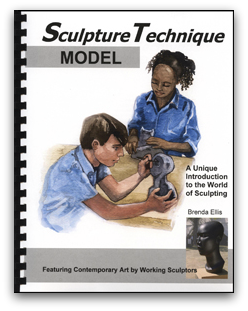
This book is a little different from other ARTistic Pursuits books you may have, in that it is divided into three separate units (one for each kind of medium) and allows the student to start in any of the three areas.
FYI- this review is going to have A LOT of pictures...because I know you're going to want to see what we made :)

The wool roving snowman - LOL!
Our girls really wanted to start with 'unit 3: creating surface with fiber.' Each unit begins with information for the students to read that helps them think about the medium they will be working with, along with a property they will be focusing on. 'unit 1:creating mass with putty' talks about "mass" and then goes on to give equipment and safety advice for working with putty. 'unit 2: creating scale in clay" talks about "scale," and then continues with instruction in the properties of clay, and how to modify household items to make your own inexpensive tools for working with clay. Unit 3 focuses on "surface" and includes lessons on the color wheel and the differences between wet felting wool and needle felting. While Sculpture Technique: Model is geared for ages 11-18, the wool felting may be the hardest unit, and is probably better used with students who are at least 13.
One of the things I like the most about ARTistic Pursuit's books are that they are non-consumable, so you can use them over and over (and you will WANT to!) Sculpture Technique: Model retails for $47.95, and will definitely fill a year (or more) of your student's art class time. There is a suggested timeline in the back which gives you the outline to finish the book in 36 weeks. The back of the book also has some great resources, like an essay by Daniel Ellis "The Road to Creativity," and suggested grading guidelines. I personally would hate to have to assign a letter grade to an art project, but the reality is that most of the students using this book will need some sort of grade for the course for their transcript. This makes the grading suggestions REALLY helpful. The Ellis family reminds you that the majority of the student's grade should come from finishing their projects, with only part of the grade coming from written or oral answering of the self-evaluation sheets at the end of each unit.
By now you're probably wondering "What did they think of the book?" I'll tell you... IT WAS AWESOME! Emily and Arlene have been working with wool a lot this past Winter and Spring learning how to spin yarn, so learning how to do other cool things with wool roving fit in wonderfully with what we were already doing. (BTW- the girls are learning to spin from their dear mentor Sue, who also gave us great ideas for where to purchase our wool roving and some safety tips for needle felting.)
As I mentioned earlier, this book by nature lends itself to be used over blocks of time, so the student gets more actual work done on their project (instead of just getting all the supplies out every day and not getting much accomplished.) Each time we worked on this unit, the girls spent between two and three hours. I will admit, I joined in the fun! First, we read & re-read the section about wet-felting. (I also read ahead to the needle felting section, but I wanted the girls to focus on one thing at a time!)


unit 3 begins with 'create felt sheets.' [Note: the units are not capitalized, nor are the sections, so I'm trying to include them just as they appear in the book.] This first section taught the girls how to prepare their wool roving, felt it by hand, and then pre-shrink it by the fulling process. When we were done, Emily (age 15) said our wool looked like tortillas. She was right!

Layering the roving
Next came felting... it's hard to get a picture of that - they're always moving!

Fulling to pre-shrink the felt

Rinsing out the soap

A wool tortilla :)


Felting and fulling the colored wool


Needle felting is super cool, and really creative, but you MUST pay attention to the needles are they are REALLY sharp. The girls' spinning mentor Sue suggested having them hold their projects down with cookie cutters until they got used to using the needles, and it worked really well. The first project in this section has you needle felting a bird, because the body shape is easier than some other animals to create. Then you learn about adding details (like eyes.)

Encourage your student that it takes time to learn how to needle felt, and not to be discouraged with their first results. With each time we worked on these projects, the girls' techniques improved and they really began to understand HOW the fibers in the wool react to the felting process. Right after the bird project comes a focus on appendages (think legs) and surface design. The girls were really, really excited about this part. Arlene wanted to make a sheep to give to her mentor Sue, and Emily wanted to make an Ox to give to her Ag mentor Kevyn.

Ox body

Sheep- add eye & ears

Sheep - add a nose... Arlene said it looked just shorn- so...

Make it a fluffy sheep!

Now that's fluffy!
These were NOT easy projects, but the girls worked and worked on them until they were to their satisfaction. Arlene decided her sheep was not fluffy enough, so she lightly needle felted on some llama hair that we had been given to make it extra fluffy. Emily patterned her ox after one of the ones Kevyn works with every week, Blue, from Conner Prairie. He is a Randall Lineback if you want to google the breed.

Can I just say again... we LOVE this book! We are by no means finished with this unit. Both girls want to make more animals, and so do I.

I think we will continue in this unit for the rest of the school year, and save the other two units for next year. The book is well written, both in information about the various mediums and planning your projects, AND in the instructions. The book contains both color photos, and black and white illustrations to make sure you understand what is being asked of you. While watching the girls work on their sheep & ox, I was contemplating what I wanted to make. Both girls quickly learned how to manipulate their wool to get the desired effects on their animals, and I wanted to do something they weren't already doing... so instead of an animal, I decided on a needle-felted flower.


While most people think of ARTistic Pursuits as a homeschool art company, I would love to see it used in summer camps, after school art programs, and in traditional and/or private schools. Each book I have seen is written TO the students, with information to help the instructors, whether they've ever done anything with art before of not!
Other Crew members reviewed both this Sculpture book & the other new one, Sculpture Technique: Construct, as well as the Preschool and Elementary books from ARTistic Pursuits. Click the banner below to read all the Crew Reviews!


These are fantastic. I have wanted to learn wool felting and this just makes me want to learn more. You all are very determined and I enjoyed seeing your work very much. - Lori
ReplyDeleteLove!
ReplyDelete